
Getting started
-
Install YARK
Download the current Windows installer and run it. After install, open YARK server manager.
Before running an unsigned prerelease, follow Verify your download below and compare it with the matching official release asset.
-
Point SteamCMD
Install SteamCMD somewhere writable. In YARK → Settings, set the SteamCMD path (folder that contains
steamcmd.exe).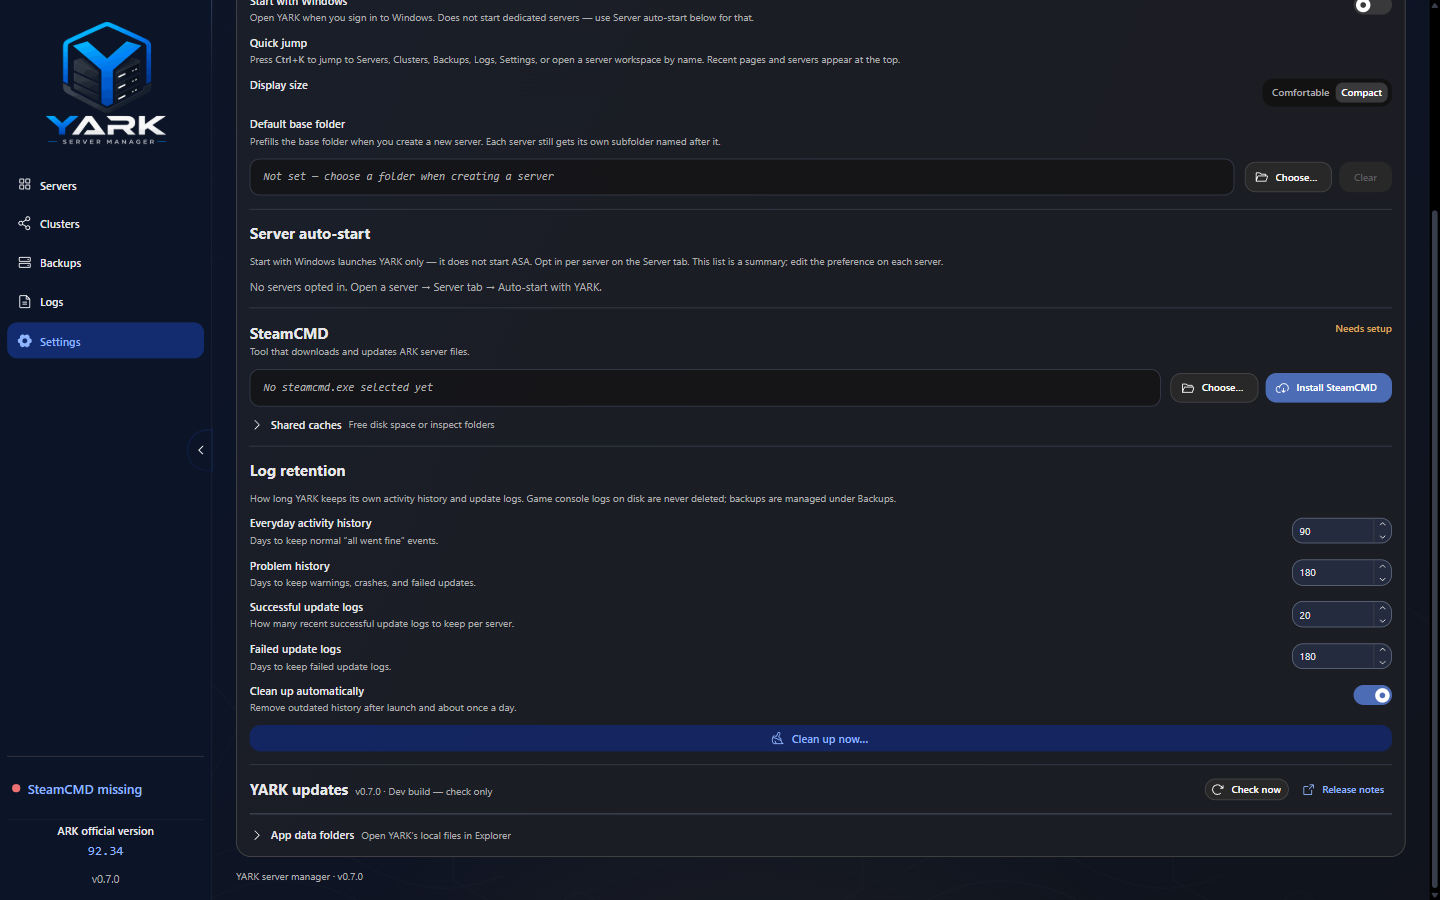
Settings — set the folder that contains steamcmd.exe. One SteamCMD home is shared across profiles. Next to it, YARK maintains:
Cache Role steamapps/depotcacheCompressed Steam downloads asa_content_cacheShared expanded ASA files copied into each server -
Create a server profile
Add a server with:
- Install path — absolute Windows path (
C:\ARK\MyServeror UNC) - Map + session name — official maps from the list; CurseForge map packs need the pack on Mods (enabled) plus the launch token under Map (Map mods or Custom…)
- Ports — unique game / query / RCON within the profile and across other profiles (the form shows live port conflicts vs the fleet)
- Admin password — at least 4 characters
- Cluster — None, or pick an existing fleet cluster (fills Cluster ID + shared directory). If you have no clusters yet, use Create a cluster first… from the form, or create one later on the Clusters page.
You can leave a new profile disabled until files are ready; Enable does not require a Ready install. Start, Restart, and auto-start still do. For a first custom map, see Mods → Maps / custom worlds.
- Install path — absolute Windows path (
-
Install dedicated files
From the server actions, run the files install / update. First sync can take a long time and needs free disk for the shared cache and the per-server copy. Worlds under
ShooterGame\Savedare not overwritten by the cache sync. -
Start the server
Press Start. Status stays starting until RCON answers on localhost — that means “accepting players”, not merely “process spawned”. Use Logs → Runtime / Events if it stalls.
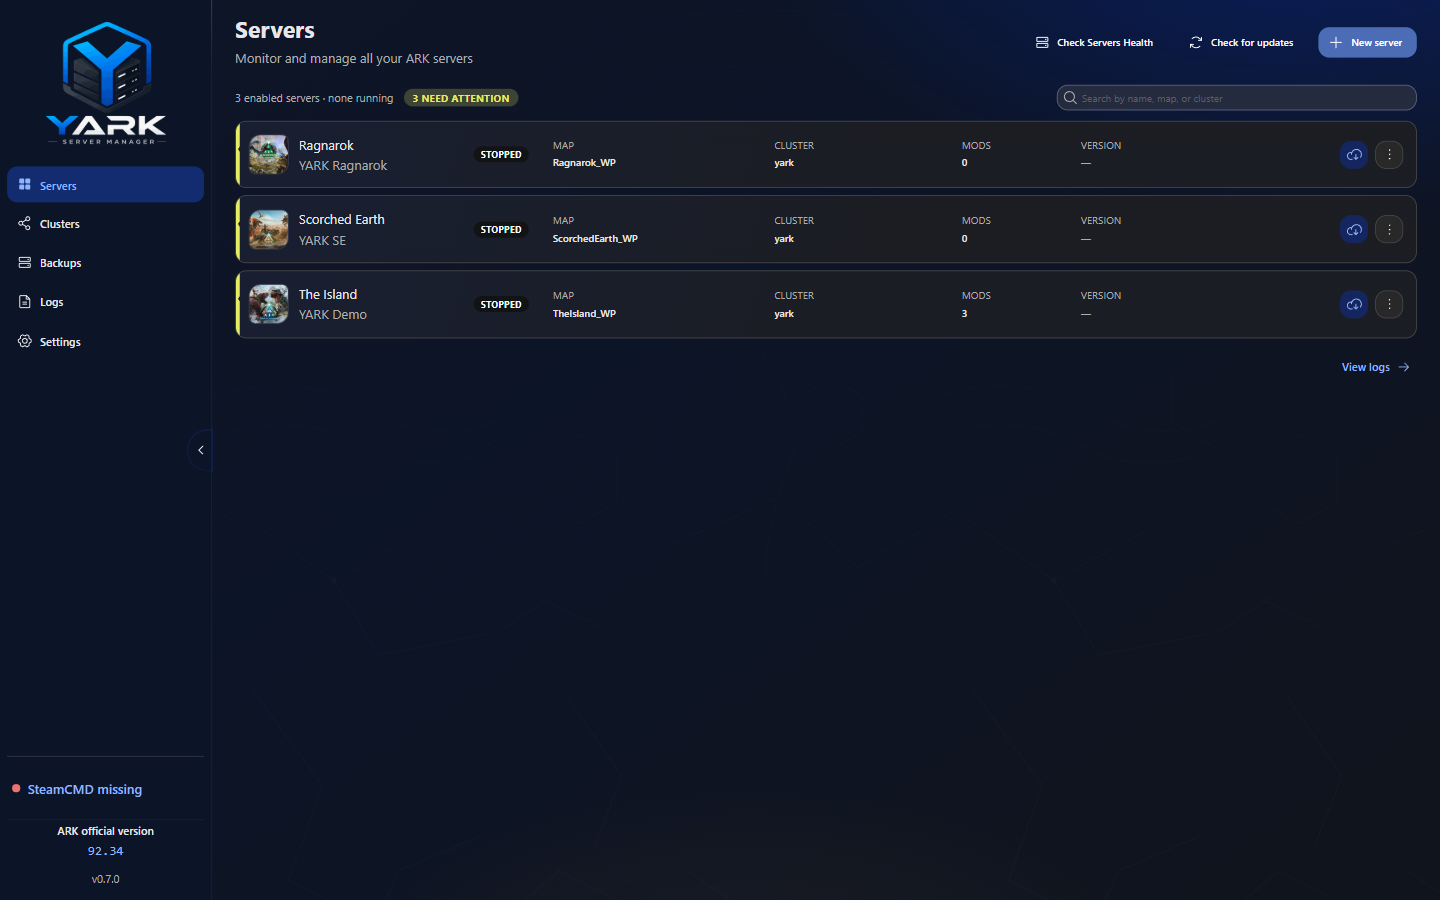
Overview — install/update and Start live on each server card. -
Take a backup before experimenting
Open the workspace Backups tab and create at least a world backup. Prefer safe update / restart later so critical-path snapshots run for you.
Tip: Ctrl+K opens Quick jump to pages and servers. Structured ASA launch flags live on the workspace Launch tab (see Start, stop, restart).
Verify your download
Section titled “Verify your download”Use the exact installer name for the version you downloaded:
Get-FileHash ".\YARK-server-manager-Setup-VERSION.exe" -Algorithm SHA256Open YARK Releases, select the matching version, and compare the complete SHA-256 value. Do not install the file if the values differ or if it came from a mirror you do not trust.
Current prereleases are unsigned, so Get-AuthenticodeSignature will not show a verified YARK
publisher yet. This page will document the expected publisher and RFC 3161 timestamp once signed
releases are available.
Next reads
Section titled “Next reads”- Profiles & ports — validation rules and conflicts
- Start, stop, restart — what each action does
- Updates & SteamCMD — patching without losing worlds
- Backups — schedules and restore rules